Saturday, March 15, 2014

Parmesan Garlic Spaghetti Olio With Red & Green Peppers

I make one pasta dish a week and it's usually a variation of Spaghetti Olio. In Italian, Olio means oil. So this spaghetti dish is oil based, simple, and versatile. You can't go wrong with an olive oil and garlic base - and then whatever else you want to to flavor the dish. What's fantastic about it is that my whole family loves it. Our picky toddler can devour this in massive amounts. It is a winner and it's soooo easy to make.


Parmesan Garlic Spaghetti Olio 
With Red & Green Peppers
By Elle A
Serving Size: 4
Total Time:  35 minutes
INGREDIENTS
4 Garlic Cloves
1/2 Large Chopped Onion
1/2 Large Red Pepper Chopped
1/2 Large Green Pepper Chopped
10 Cherry Tomatoes Quartered
2 tbsp ghee or butter
1 Box of Spaghetti
1/2 cup Olive Oil
3/4 cup Water
2 tbsp Garlic Powder
3 tbsp Parmesan Cheese
Salt & Pepper
6 Strips Turkey Bacon Chopped


INSTRUCTIONS
  1. Saute garlic in a large pot with 2 tbsp ghee or butter until golden. Add the chopped onions and cook for 5 minutes on medium heat. 
  2. Add the red pepper and green pepper and cook for 5 minutes. Stir occasionally. Set it low heat for another 5 minutes. Continue stirring. Add salt and pepper as desired and then set aside. 
  3. Cook spaghetti according to package directions. 
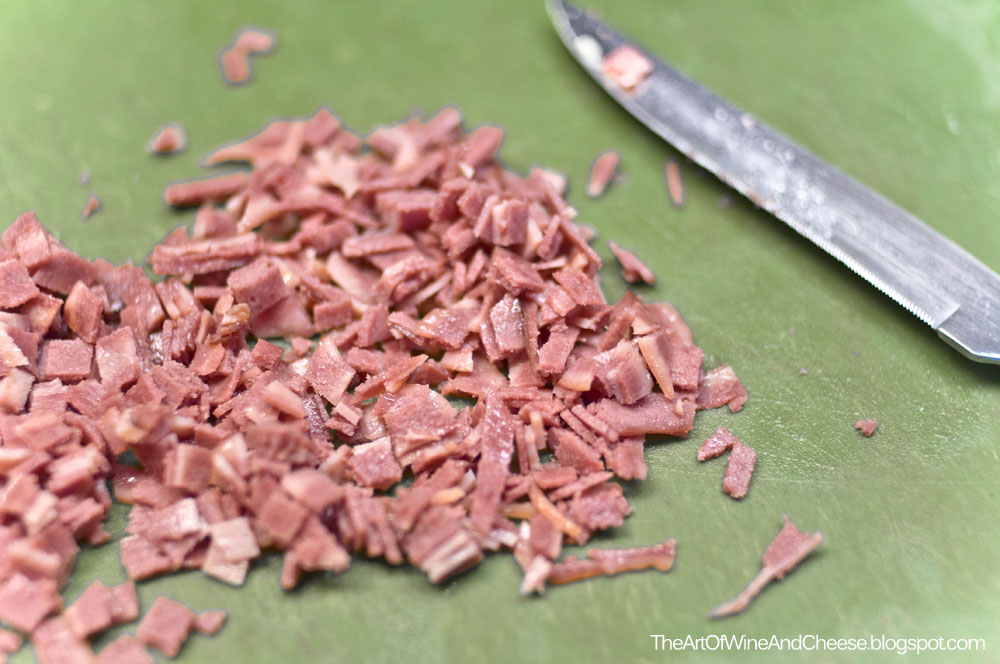
  4. Cook turkey bacon strips according to package directions and set aside. Chop once cooled.
  5. In a large mixing bowl, mix together 1/2 cup olive oil, 3/4 cup water, 2 tbsp garlic powder, and 3 tbsp Parmesan Cheese. Add Salt and pepper to taste. Mix.
  6. Add the cooked garlic, onions, and the red and green pepper. Mix.
  7. Add more salt, pepper, garlic powder and Parmesan cheese to taste. Mix.
  8. Mix in or top with cherry tomatoes.
* To make this diabetic friendly, use Dreamfields Spaghetti
* Substitute tomatoes with chopped sun dried tomatoes for a different taste
* For a kick, sprinkle crushed red peppers
* Omit turkey bacon to make it vegetarian
Bookmark and Share

Saturday, February 22, 2014

Copycat Panera Asian Sesame Dressing

In an effort to consume more greens in our diet, I've been packing salad for our lunch to bring to work. Every morning I chop fresh vegetables. There is something serene and peaceful about prepping veggies. Maybe it's just me, but it puts me in a happy place where time stops and life is nothing but simple.

With eating more greens, I've started to make my own salad dressings. My personal favourite is the dressing that accompanies Panera's, Asian Sesame Chicken Salad. I love sesame taste and the dressing has a sweetness to it. I haven't checked how much it costs at the restaurant to purchase just the dressing compared to finding the recipe and slapping it together myself, however I chose the later for cooking experience.

It's fantastic! I got the recipe from iowagirleats.com. She has the recipe down to the chicken it comes with. Here's the fantastic recipe for the whole shabang. LOVE IT! Tastes like the real thing.


Bookmark and Share

Wednesday, January 29, 2014

Complete a 30 Miles in 30 Days Challenge - DONE ✓

01.16.2014 - 3 miles
01.17.2014 - 2 miles
01.18.2014 - 2.25 miles
01.19.2014 - 3.25 miles
01.20.2014 - 4 miles
01.21.2014 - 1 mile
01.23.2014 - 3 miles
01.24.2014 - 3.5 miles
01.26.2014 - 3.25 miles
01.28.2014 - 2.5 miles
01.29.2014 - 5 miles
-----------------------------------
Total miles  - 32.75 miles

YEAH! 30 miles in less than 15 days. I feel wonderful! Next challenge is to run 60 miles in 30 days. Definitely doable. This challenge continues.

DONE ✓ 
Bookmark and Share

Thursday, November 21, 2013

Product Review: Kate Spade Micas Pond Lacey Wallet

Kate Spade New York
Mikas Pond Lacey
Coloure: Sugared Grape

Hello, my name is Eleanor and I'm addicted to Kate Spade products! 

The Kate Spade (Lacey design) wallet has been in my wish list for as long as I can remember. This year, my husband gave me the Mikas Pond Lacey Wallet in Sugared Grape for my 33rd birthday.

Before I go on into my review, I just want to mention that when my husband asked me what I wanted for my birthday, I told him exactly what it was (within the budgeted reason) and he paid for it. There was no passive-aggressive-read-in-between-the-lines type of expectation, just plain, "This is what I want." It makes gift giving so much easier and stress free. BIG KUDOS to my hubby. But I digress...

Kate Spade New York
Mikas Pond Lacey Wallet
Coloure: Sugared Grape

PROS
Quality leather, plating, and craftsmanship.
Beautifully designed with plenty of organizing compartments.
Fits one checkbook.
Inside contains 2 bill slots
Inside contains 12 credit card slots.
Inside has a zipper divider to secure important items.
Outer zipper closure to contain paper and monetary goods.
Slip pocket at the back.
The color pops, which reminds me of happiness during the dullness of winter.
Use as a Grab-And-Go on days you don't want to wear a purse.
I got the wallet on sale. *

CONS
Zipper gets in the way when you take credit cards out of the top most compartment.
Difficult to zip shut if you keep a month's worth of receipts, coupons, coins.

This product is beautiful. The stitching is perfection and the leather feels good to the touch. To me, the pros outweigh the cons. The zipper getting caught on the credit card is minor. The solution is simple, gently push the zipper back and take out the card. As far as over-stuffing your wallet to the point of non-closure, it's time to simplify. Do you really need all that stuff?

Overall, I'm very happy with this product.


*If you know me, I'm extremely cheap and frugal. It is extremely rare that I purchase anything full price. I usually avoid taking home anything less than 40-50% off. Luck was on my side when I stumbled upon the secret sale from the Kate Spade website. I was ecstatic!
Bookmark and Share

Monday, November 11, 2013

Broccoli Rice Casserole


Six years ago, my co-worker, Mindy, brought a Cheesy Broccoli Rice Casserole to a work potluck. The way she made it was fantastic. I went for a third and probably a fourth serving. I've only cooked it once since then, but yesterday my cravings were specific. 

I had to go by memory when cooking this dish. The main ingredients called for mushroom soup, broccoli, and rice. Slapped those together with a other ingredients, and voila... comfort food. Delicious! The family loved it... but most importantly, my toddler loved it - and he's a picky eater. 

Broccoli Rice Casserole

Ingredients
1/2 cup (1 stick) butter
1 large onion, chopped
1 package (16 ounces) frozen chopped broccoli (fresh is better)
1/2 cup water
1 can (10 3/4 ounces) Campbell's® Condensed Cream of Chicken Soup
1/2 cup shitake mushrooms, chopped
1 cup shredded cheese
1 1/2 cups cooked regular long-grain white rice
French's Onions


Heat the butter in a pot over medium heat. Add the onion and cook until tender, stirring occasionally. Add the shitake mushrooms and cook for 3 minutes.

Stir in the broccoli and cook until tender, stirring occasionally. Add the soup, water, cheese, and rice. Cook and stir until the cheese is melted. Pour the broccoli mixture into a 2-quart shallow baking dish. Top with more cheese, French's Onions, or both.

Consume, or wait and bake at 350°F for 20 minutes or until the mixture is hot and bubbling.
Bookmark and Share

Thursday, October 31, 2013

All About UGG Boots - The Comprehensive Guide

The first time my eyes beheld UGG boots was circa 2003. They were the UGGliest things to ever hit the fashion scene. I cringed every time I saw women wear them. To me they depicted the ultimate sloppy, lazy persona of walking out of bed to mingle with people of Wal-Mart. Boy was I ever wrong.

I bought my first UGG boots 3 weeks ago out of necessity: to be comfortable, warm, and agile enough to run after my toddler son should we be out and about meandering all over town (during the colder seasons). So, for my 33rd birthday, UGG boots were the gift to myself.

It took me a while to actually hit the store to try on these boots. I'm the "research-ad-nauseum-ad-infinitum" type of consumer. I read endless reviews, and then weigh the pros and cons - especially when it will be a big purchase. Let's face it, these boots aren't cheap - they're a luxury to own. Avoid buyers remorse? You betcha!

Below are things to consider when buying the UGG boots:

  • Decisions, decisions, decisions 
    You get to the store and find yourself in front of the UGG section and are inundated with a plethora of different styles. That was me! I didn't know which style to try on, so I asked the shop girl to get 5 different styles in my size and in different colors. It's literally like finding the perfect wedding dress - it's a big decision so you have to come out of the experience totally in love with it. I tried on everything. Shop girl didn't seem to mind. I created a positive rapport with her prior to asking for help.
    • *** Coloured insoles can rub off on your white socks.
  • Losing Your UGG Virginity 
    You will love it! The first time I stepped into the style featured above, it felt like my feet were enveloped and bathed in the warmth and coziness of clouds. My gosh, it was absolutely wonderful. So snug and comfortable. Warm toes are the way to go.
  • Size & Fit
    In most boots, I usually get 1/2 size larger since I wear thick socks, but UGG boots only come in whole sizes. Make sure you try on different sizes and get the boot that is perfectly sung and comfortable to walk in. Don't just walk a couple of feet with them at the store, walk around the whole perfume and make-up section if need be. 
  • Socks or Not To Socks
    Some people suggest that you don't have to wear socks when wearing UGG boots, but it's better if you do. Feet sweat and when they are marinated for long hours day after day of use... the shoe will cause absolute disgust in the aroma area of the senses. People suggest to powder the insides to absorb the sweat, but it can get disgusting in there. WEAR SOCKS! 
    • *** If you have long toe nails, I suggest trim them. In the long run, long toe nails will rub on to the top of the boots and will create a hole. (See picture) If you wear socks, this could be prevented.
  • Arch Support & Insoles
    There is no arch support with such UGG boots. If you have plantar problems, put your inserts on top of the sole. It doesn't lift up. Worn out insoles? No problem, you can buy insoles here: Insoles 01, Insoles 02
  • Leather/Suede Protection
    There is an UGG kit you can buy - but you can get away with just the UGG Sheepskin Water and Stain Repellent. It will do the job. I even used the spray in some of my suede jackets and pumps. Spray once a month for protection.
  • Storage
    Once you decide on a specific style, ask for an untouched pair - meaning, boots that have not been tried on. These boots will come with a shoe form. Keep these in order to maintain the boot's form when storing them away. They are fantastic. 
  • Wet & Dry Weather
    Avoid wearing UGG boots when it's wet outside. These boots are made of sheepskin, and when it gets wicked wet, they tend to smell. Also, a drop of water fell on my boots the other day, when it dried, it created a watermark. If you bought the UGG Kit, you can remove the stain using the brush. Watch the video in the link for more information -or- remove the watermark stain by rubbing it back and forth. 
    • *** Avoid cooking when wearing these boots. Oil and grease will stain the boots... permanently.
  • Real vs. Fake
    First of all... to eliminate such the problem, purchase UGG shoes only in trusted department stores or online shoe stores that are legitimate, see link below, otherwise there is a chance that they will be fake. You don't want to get duped. Second, there are things to look for when buying Authentic UGG shoes:
    • Look through this gallery from the official UGG website to learn how to spot fake UGG boots
    • The tags inside the boot should have some kind of reflective security label sewn in the left shoe or in the shoe box. (see picture) 
    • Buying online? Here is a list of authorized online retailers.
  • Things I Missed
    I missed a lot here. If you have anything to add, leave it in the comments section.
My UGGs in action:


Bookmark and Share

Tuesday, July 30, 2013

Roasted Russian Chicken Drumstick With Quinoa & A Side Of Cauliflower Casserole

Roasted Russian Chicken Drumstick With Quinoa And A Side Of Cauliflower Casserole
Nutrition Facts (per plate): 393 calories, 16.9g fat, 3.5g saturated fat,
3.6g sugar, 24.5g protein, 37g carbohydrate, 5.5g fiber, 0.5mg sodium

I whipped this meal up real quick for dinner the other night. A few days later, the whole thing was gone! I cooked a lot too. It was pretty excellent if I don't say so myself.

There should have been 1 serving of the cauliflower casserole on that plate - there's only half a serving shown in that picture. I got too excited and forgot to put the other serving in. Oops. Also, the spice I used on the chicken is a Russian seasoning for potatoes but it still worked its magic on the chicken. The flavor was mild, yet middle eastern tasting. Like I said, EXOTIC!

Russian Seasoning For Potato Dishes
Ingredients: salt, sweet paprika, onion, sugar,
ground parsley, garlic, black pepper,
caraway seeds, cucuma, dill seeds, bay leaf.

Click Here
Roasted Russian Chicken Drumsticks
(serves 8)

Ingredients
8 organic chicken drumsticks
2 packets Russian seasoning for potato dishes
1/4 cup of olive oil (use less if you have to)
1/4 cup water (use less if you have to)

Place chicken drumsticks in a quart size Ziploc bag. Add water, olive oil, and 2 packets of the Russian seasoning. Shake until chicken is coated evenly with the mix. Marinate for 2 hours.

Preheat oven 300° F.

Spray glass bakeware with spray oil (I used our pyrex bakeware). Place chicken and bake for a total of 30-40 minutes flipping the chicken over and basting every 10 minutes.

* If you want the skin to be crunchy, broil for 1-2 minutes after it's cooked.


Plain Quinoa
(serves 8)

2 cups organic quinoa
4 cups water

Place quinoa in a sifter. Rub and swish the quinoa with your hands and rinse until the water is clear.

Combine quinoa and water then bring to a boil. Once it's boiling, simmer and cover for 15 minutes. Let stand for 5 minutes covered then fluff with fork.

* Some people use chicken, beef or vegetable broth to substitute for the water. Some add olive oil as well.


Cauliflower Casserole
(serves 8)

1 large head of cauliflower chopped
1 medium sized red onion chopped
1 medium sized red pepper chopped
2 tbsp garlic finely chopped
2 large eggs
1 cup mozzarella cheese
salt and pepper to taste

Chop cauliflower. It doesn't need to be fine. Place in a microwave safe bowl and microwave for 8 minutes on high until tender, stirring once or twice. Add red onion, red pepper, garlic, eggs, and mozzarella. Mix evenly.

Coat a glass bakeware with spray oil and press the mix evenly in the pan.

Bake at 300° F for 15-20 minutes until cooked. Cool for 10 minutes and then serve.

* I also used this casserole as a crust for pizza. Just top with sauce, cheese, and toppings and then bake until cheese on top is oozing.
Bookmark and Share